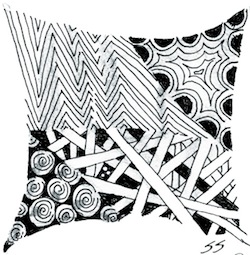
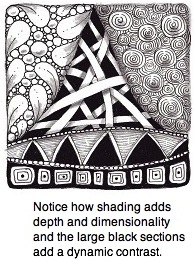
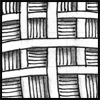
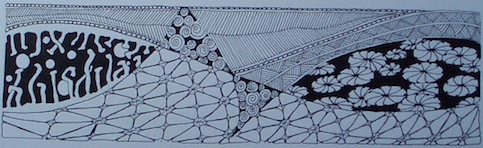
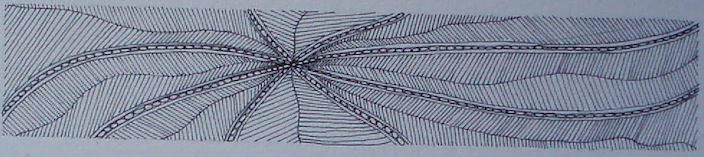
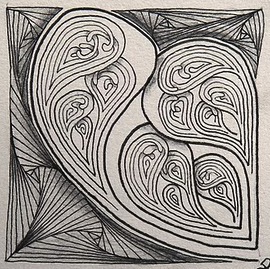
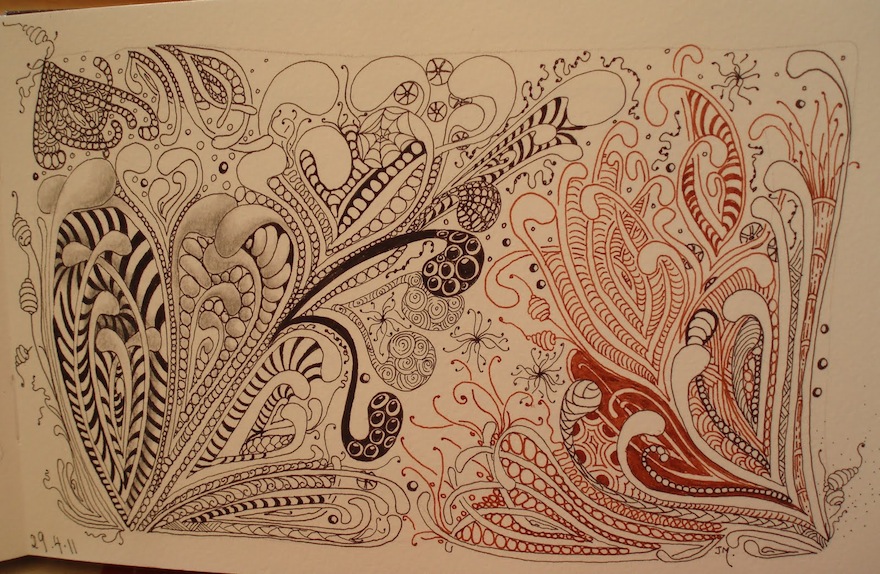
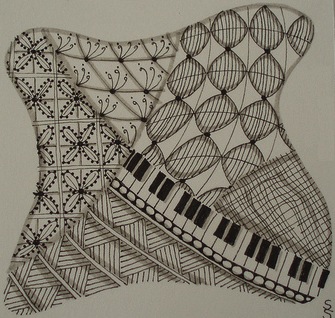
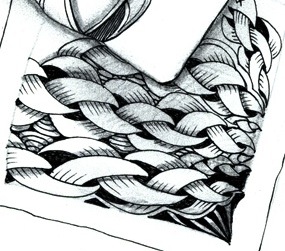
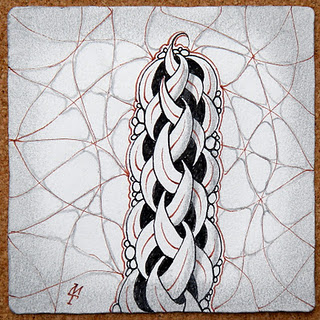
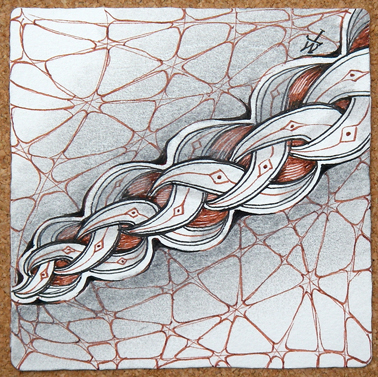
Instructions
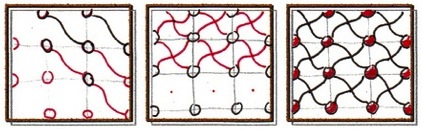
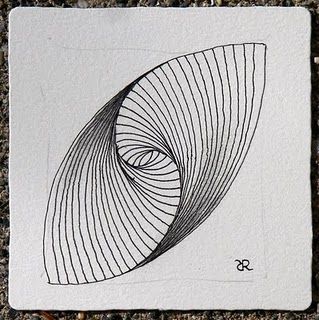
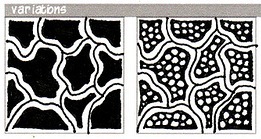
2-n-5
Probably benefits from a fairly large area - at least four grid squares in each direction I think.

afterglo


ahh
Can be done with or without the circles at the end of the lines.

archer
A repeating pattern or a good border


arrowheads

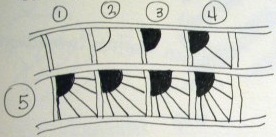
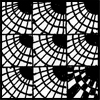
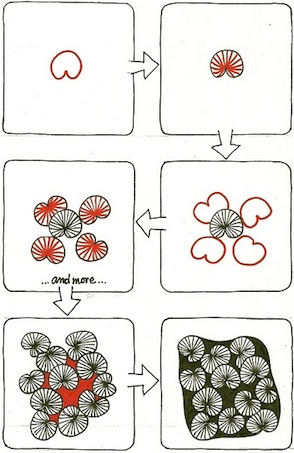
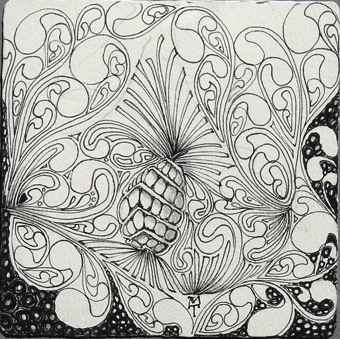
asian fans
Makes a striking filler and a cool border


assunta


bales
Bales begins with a basic grid then add little elongated rice shaped ovals.
The basic pattern looks like simple flowers, but by adding black or shading in areas, it changes completely. Try colouring in only one half of each "rice pellet" or colouring in some of the pellets to make a pattern.
Variants include adding different shapes between the "flowers" (dots, circles, diamonds, etc.), shading, filling in shapes as the pattern takes form, using a curved grid.
medium-width rice shapes with diagonal lines between them


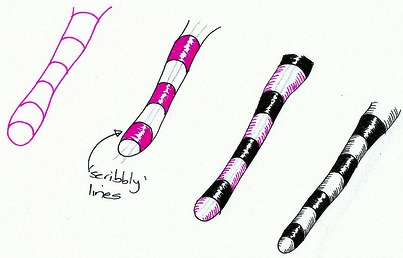
barberpole
A simple and useful pattern with lots of variations for very effective borders.
To give a pattern such as this a more three-dimensional appearance, use the shiny stripes effect.

bateek
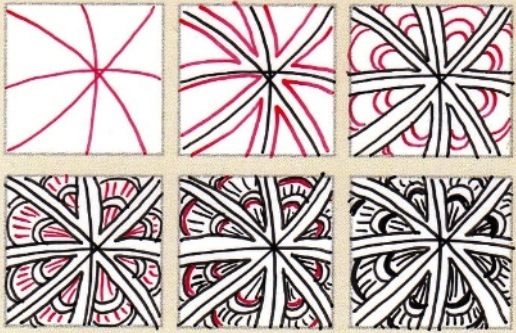
The charm of this tangle is in not being too perfect with the lines radiating out from the center dot; draw the lines as radii, not across the complete diameter.
Dressed up with a little shading added, it takes on a nice dimensional quality.

baton
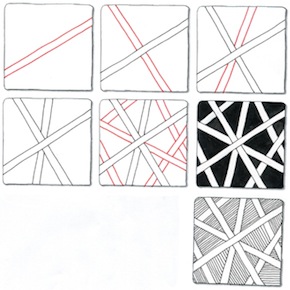
Sets of parallel lines that are made go anywhere you want them to.
I usually begin in a small corner with some parallel lines. I turn my tile just a bit, and make the next set of parallel lines. Turn the tile a bit, repeat.
The lines can either fill the string, or stop them wherever you like. There is no real rule to this one, it's all about the rhythm that seems to take over once you get started!
I like to fill in the little corners with black, which helps define the angles. And the shading on this is just too much fun.
This tangle is especially fun with more complicated strings. As the sections run into each other, some interesting shapes and angles can emerge!

bb
Depending on how you shade it, BB can look like stacks of books, or a bunch of washers. To make it even more 3-D, use a very simple background pattern, like Keeko, and use shading to tone it down even further.


beelight


beeline

betweed


bilt
Can be varied by using curved lines instead of straight.


black-eyed peas
A cute filler for large shapes.


black box
Can be used as a border design.
Variants include changing the dimensions and proportions of the boxes, and leaving the larger or smaller squares as outlines rather than filled.

bluebonnets

boomerangs
You can draw them all in the same or opposite orientation, overlapping in different ways, and/or alternating the rows, and the fills can be changed in a multitude of ways.


bowties
Pencil in lines to split each grid square into quarters. Use the intersections with the grid for the start and end points for the diamond and circle segments. If anything, make the diamonds and circles slightly larger than they'd be from the half-way marks.


brayd
Start with a type of Mooka string crossed with two curved lines and filled with Yincut. Leave the string in pencil to get the open weave effect and puff Yincut out a bit.


bridgen
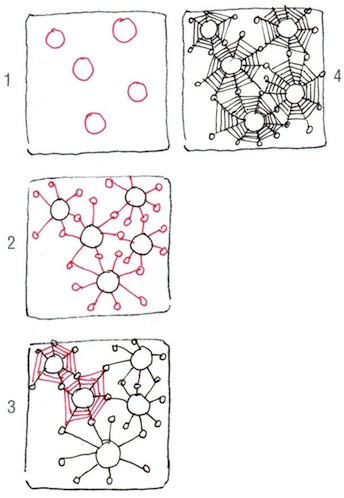
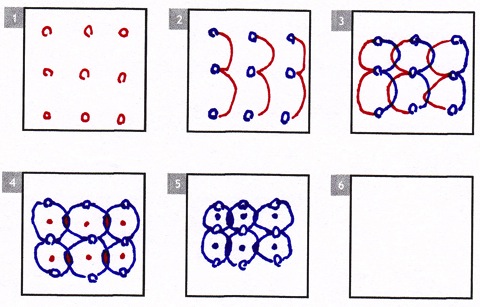
There are tangles a bit like this one, but what makes this different is the process of the sequence. For instance, in Tink, the circles are drawn first inside a string section, and then randomly connected. In Bridgen, the string IS the basis of the tangle. All of your marks are made one after the other, connecting right onto the string itself. (This part is fun, as path decision is already made.) Once you have covered your string, then (step 6), make the next circle inside a section next to, or far away from the last circle you made. Then make another "bridge" mark (step 7) to connect them, letting the new line fall under the line that is already there. This will result in a Hollibaugh effect, of items falling behind. Remember, the bridges can be curved or straight. Find your own rhythm: do you like to make a circle then connect? Or do you like to make the lines and cap it with a circle? Are you in a mood to fill up the space or leave some blank and open?
Works best with larger circles and thinner connectors. Avoid putting circles where the lines of the string intersect.
The icon uses a 'Nzeppel-like "rounding" effect.


bronx cheer

bubbles

bucky


bumps
Bumps can use many similar shapes to achieve its pattern.
Whether you start in the middle or in a corner, each shape builds on the one beneath it. Each shape will have one, two, or three humps on top. Draw each shape large enough that you can put a small shape inside or draw the small shape first and then do the aura.


bwiya


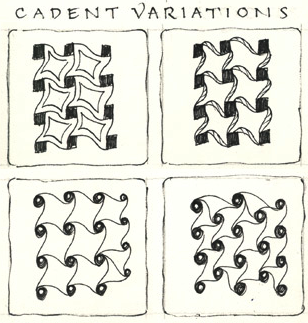
cadent
Variants include varying the width between the anchors, shading, using pairs of lines for each S, and drawing various shapes within the white space created by the lines (many of these additions start with an inner aura).
A basic variation is to create cadent from squares and straight connectors.
Another variation is to create a field of different sized and randomly positioned circles, giving three, four, five sided elements.


canard

carres
As for 2-n-5, this might benefit from a fairly large area - perhaps at least four grid squares in each direction.

casella


cat-kin
celtic
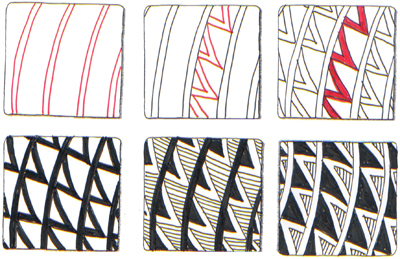
The look of Celtic can be varied by changing the height of the zig zag, and the length (a higher zig zag creates a larger celtic design).

chainging


chard
After you draw the initial grid and diagonals, if you draw all the strokes going in one direction first then you can turn your tile and draw the remaining strokes to meet up in the middle.
I find it helps divide the space more evenly with my strokes if I place the center one first as I did in the first box in step 3. Then I eyeball the space either side of that to make the strokes dividing the remaining space.
Chard really comes into its own when you shade the center diagonal area giving it the 3D effect.

chebucto
To get a row of uniform size, use a double-pencil string.


cheers


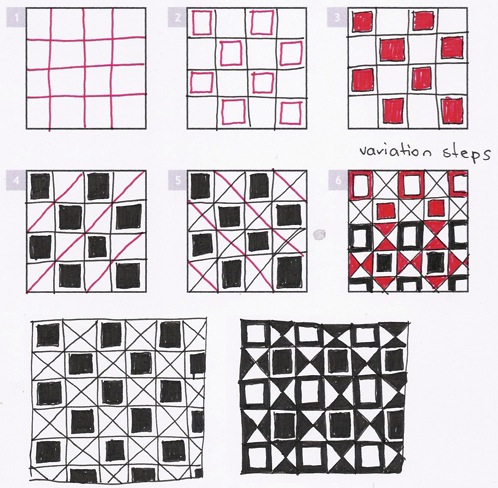
click clack
Many possibilities for variation with a choice of several different areas to fill in, shade, or not. Variation number 2 gives a whole new dimension to the pattern.
connector
Can be varied using different types of circles or dots and assorted connecting lines.

corn rows
A background fill makes the circles appear much smaller because their outlines became part of the background. Draw those circles larger where you plan to fill in the background.

cracked
variation: use different fills instead of solid colour


crescent moon
You can vary this tangle pattern with shading and striping (filling in alternate areas with solid ink or shading) and also change the shapes.
A "foundation" tangle as I often use it as my starting point and have other patterns grow out of it. I also love to put little patterns inside the moon shape and stripe-y patterns in the surrounding auras.


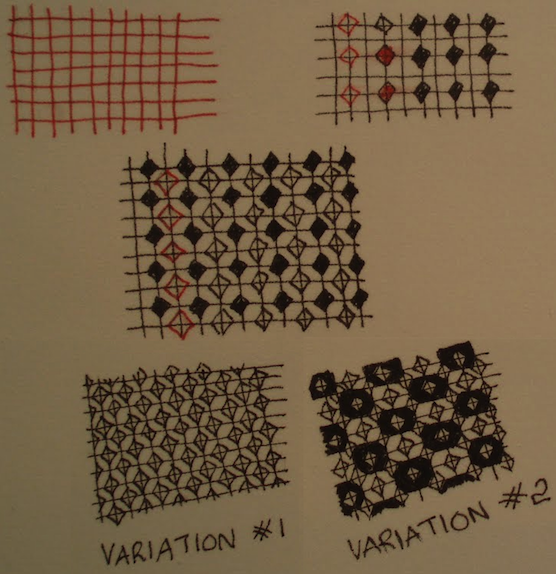
cross stitch

crossroads


cubine
Variants include using straight or curved lines for the frame and different shapes for the solid areas, shading, and filling shapes with thinly-spaced lines.

dancet
"Cadent is a lovely tangle with a scroll-like look. I sometimes like to use two lines rather than one. Although it looks nothing like Cadent when finished, this new tangle reminds me of Cadent the way it begins and it looks somewhat dance-y."


dex
You can start with squares as you would for cadent or start with a grid as in cubine.


diamond panes


diamonds & squares
dl sunray
dominos


dragonair
A combination of Fescu and Cadent.


droplets
draw the circles large enough so that when the background is filled in, the white dots remaining are still a good size


drupe


dust bunny
The shading outside the spiral is essential. You don't need to shade absolutely everywhere along the line; most of the area will give the desired effect.

dutch hourglass
This pattern can easily be adapted to make an interesting border.
If the pattern is big enough you can put tiny black dots in each of the white dots.


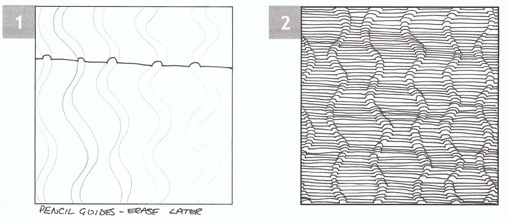
effect shiny stripes
You will notice some pencil guidelines in the second example, I dont always do this but it does give a more consistent and realistic result. The key thing is the scribbly lines, and add that extra bit of (pen) shading for added dimension.
ennies


equerre


etcher
Draw columns in pencil if you need them. Erase after drawing all triangles.
Add a "V" below each back-to-back pair of triangles.
Connect the "noses" straight down (noses drip down).
Draw a "Y" in each "Y" section.
Shade right or left sections.
Add a bit of shading at overlaps.
Colour the triangles black or add tangles in them behind the girders.
if you are getting lost in the lines, try coloring the triangles black in the beginning, then you can focus on the girders instead.

euca


eye-wa
Adds drama to a light zentangle.

featherfall

fescu
Fun to draw and adds a light, airy feel to any shape


finery


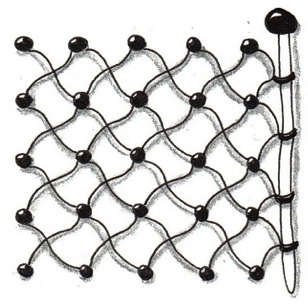
fish net
Shading brings it to life
florez
Makes an effective overall pattern and can be adapted to a border or string.


flower janem

flying geese

fricle
Part fern, part tenticle! Fricle likes to be free and break out of the box or string, but this tangle can also be used as the string.
There are many ways of varying the appearance of Fricle and the icon is one very simple version.

furr balls


gewurtz

gothic
Fill the spaces in many ways to get different effects.


hatch
hepmee
hibred


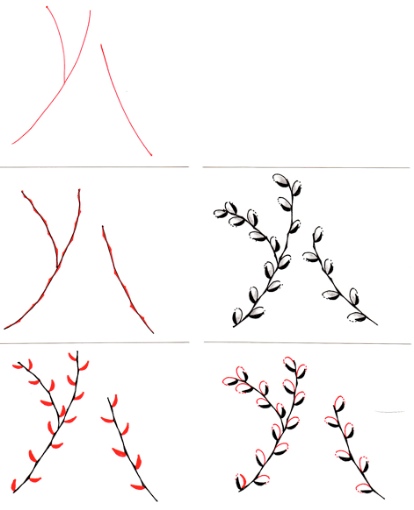
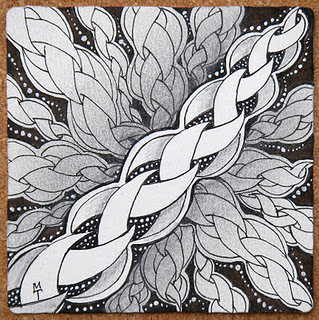
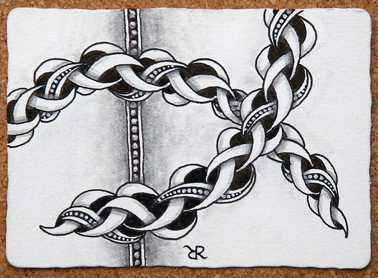
hollibaugh
Hollibaugh can look like a pile of elastic bands, or a ball of elastics, a pile of ribbons, or even a highway! Add patterns to the wider bands to make them look like ribbons. Add a dashed line through the center of each to make your pattern into a highway. If you color the background - behind each band - with black pen, it will look like the ribbons or bands are strung across a deep pit. If you do the background in a lighter color, light pencil-gray, it will look like the bands are just floating over a table or closer surface.


huggins
There is versatility to this tangle. Change whether the lines are curved or straight to really change the appearance. Warp the pattern by skewing it or folding it or making the width of the ribbon change.
Do shading. It never fails to surprise me on how much depth and dimension you get from even the slightest amount of shading.
Try making one or more of the "ribbons" that you are weaving patterned by putting a tangle pattern on it.
A variant of Huggins is W2 (Warp and Weft), drawn using straight lines instead of curved ones, and squares instead of dots.

huggy bear
Named Huggy Bear because it grew out of drawing Huggins incorrectly.


hugs & kisses
The "smiles" can be filled in or left empty. The edges of the diamonds can be shaded.

hurry
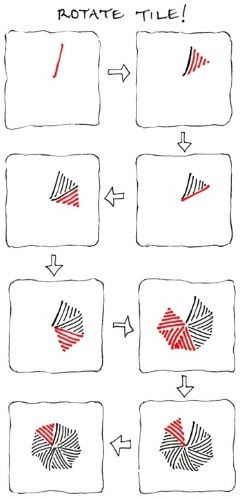
Rotate your tile!


intersection

ixorus

jetties


jonqal
Can be very bold when shaded and offers many opportunities for variations with thin lines for fills and so on.


kardz
Based on Crescent Moon.

keeko
Great for either borders or filling in a shape. Shading can add interesting dimension.
A simple pattern but it makes a perfect filler behind more complicated patterns. If you draw the lines fairly straight, it has a nice cross-hatching feel. If you curve the lines a little, it becomes more three dimensional, like a basket. Tiny, tight lines look like mesh or screen. Large, almost cartoony, curved lines look like woven, puffy yarn. Experiment with size and line thickness.


kitty


knitting
You can vary this pattern quite a bit; add solid fills, fill with dots or lines, make alternating areas solid, and so on.

kofeforn


krli-q
Pronounced "curlicue". This can be done to add a little extra flourish or in multiple in a section.


kuzek
Alternate the direction of your S shape when you turn the tile (as opposed to using the same S shape in cadent).

la bel


laced


lava juice

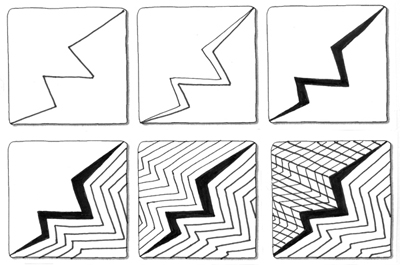
lightning bolt
lilypads
Under-lapping (drawing behind) some of the leaves gives it more dimensionality. It could be shaded where all the lines converge, or on the under-lapping, or at the edge of the tangle. In the icon, the centers are shaded to add depth.
longwood
This makes an effective border pattern too.
looby loo
Good for a border pattern. You can easily turn corners or work this along a curved string.
Adding touches of fills makes it look playful and quite different from its elegant original.
- Start with a skinny figure 8.
- Connect the figure 8s with slight overlaps.
- Add a diamond in the middle of the figure 8 and add loops to each corner. You can also see the Square Dance pattern for this step.
meer


mooka


moon rocks

msst

mumsy
Shading adds visual interest of depth to each layer of the petals.

munchin
Be sure to shade this one. It looks very three dimensional.


netting

nightsbridge
Wiggle the lines to really distort things.
To get the "bubble" effect, draw the circle first, then the checkerboard lines around it. The checkerboard IN the circle should be drawn larger, as if it is being magnified.
For colouring in checkerboard squares, always colour the square that is touching the corner of the one you just coloured. If you jump around "black, then white, then black..." as soon as you hit an object that is in front of the checkerboard, you can get confused. By going corner to corner, you circle the object and fill in more reliably. Of course, if you do "mess up" just go with it and do random squares filled-in; that makes a cool pattern like an old tiled floor; try it on purpose!

ninja stars
The black areas could be filled with thin stripes for a less bold pattern.

nzeppel
Looks very three-dimensional when shaded.


onamato
Can look like jewelry. Leave off the bands on the edges to you get "Pearlz". The tiny black circles look like jewels too - it's all in the shading. Think "smiley-face mouth" for shading the pearls and give a dark pearl a little highlight on top.


oof
When you draw your arcs, draw them all the way alongside the diamond edges, not just point to point.
Stop half way for a different tangle.


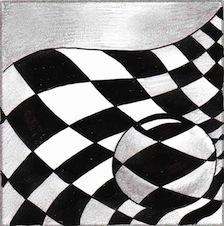
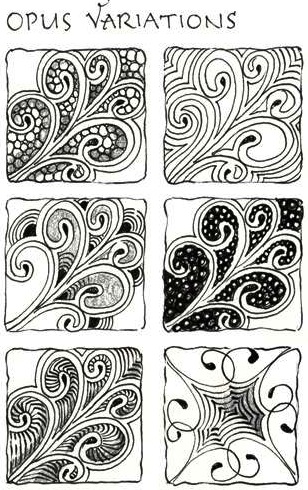
opus

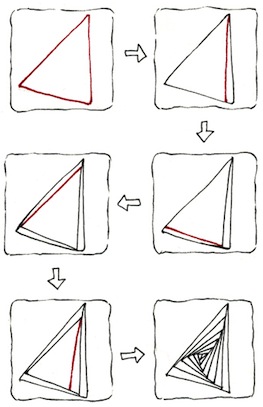
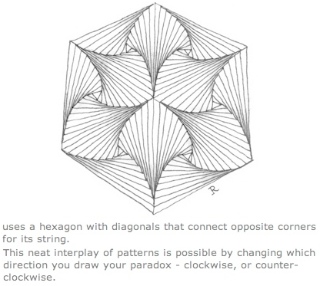
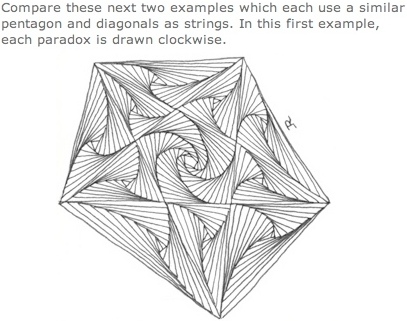
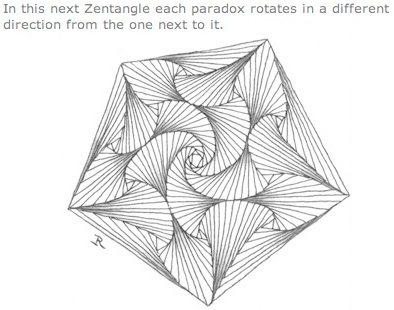
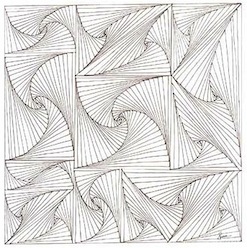
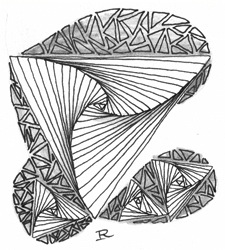
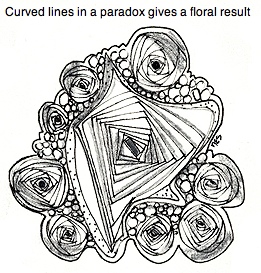
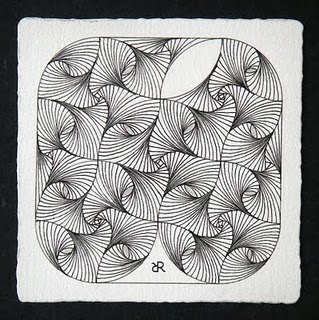
paradox
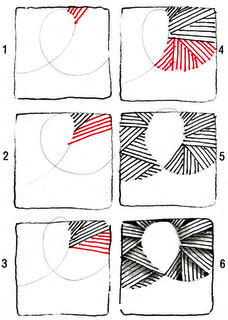
Consider drawing each line towards you, ending at a corner.
Paradox is fun to shade and appears three dimensional.
You can do this tangle with squares, rectangles, pentagons -- any shape with straight sides.
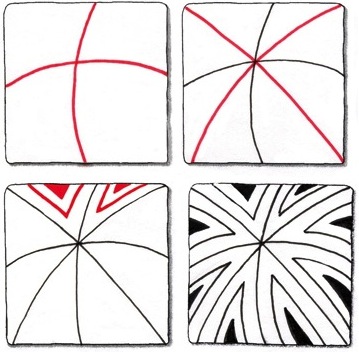
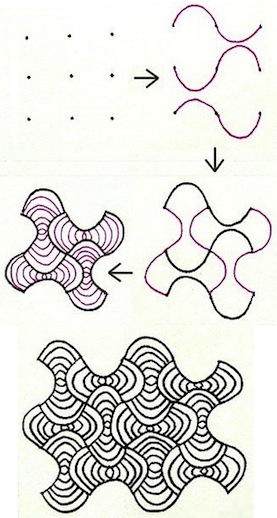
We named this tangle "Paradox" because it consists only of straight lines which create beautiful spirals.
http://zentangle.blogspot.com/2011/08/more-paradox.html
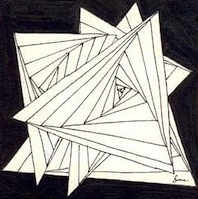

This was interestingly different because it uses mostly curved lines. The lines in the two-sided shape had to remain curved. However, in the four-sided shape I eased into straight lines after about four cycles.
I also broke one of my own "rules" and used a mechanical aid for my original circles. Everything after that was free hand. In this partially completed view you can see some of those initial lines.
I also broke one of my own "rules" and used a mechanical aid for my original circles. Everything after that was free hand. In this partially completed view you can see some of those initial lines.
This was interestingly different because it uses mostly curved lines. The lines in the two-sided shape had to remain curved. However, in the four-sided shape I eased into straight lines after about four cycles.
I also broke one of my own "rules" and used a mechanical aid for my original circles. Everything after that was free hand. In this partially completed view you can see some of those initial lines.
parch


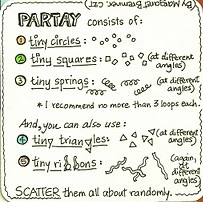
partay


pegs


pendrills
As with many of the official patterns, this one comes to life when part of the pattern is "drawn behind" giving the pattern added dimension.


pepper

pinwheels

plaid

pokeleaf


pokeroot
Try it with an aura around the final layer.

postl

pots
You might want to use a ruler to get your initial marks in place so that your spacing is somewhat even. In step 3, the small lines do NOT line up. If you end up with a different number of lines between your big blocks, that's fine - just create your own version. The shading for the big blocks in the 4th step is optional. You could leave them open and/or fill them with another pattern.

prestwood
Makes a good border. You can vary it with shading and fills of other patterns. Exaggerating the height of the initial "wave" would produce another interesting effect.


punzel
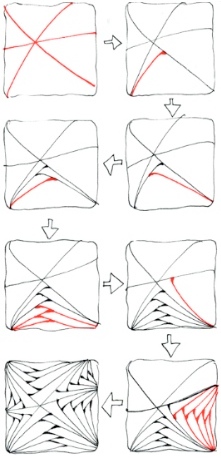
Start with chainging
The red "dots" in these instructions are not meant to be drawn; they indicate the visualization process of seeing where the next element begins as you proceed to draw behind. Visualize the continuation of the "horns" out the other side of Chainging to create sort of an "S" shape and continue their lines on that side.

purk


queens crown


rain
Can be drawn with irregular zigzags or very precise ones.
Makes a great border.


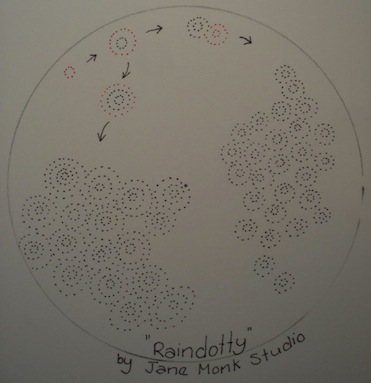
raindotty
reticulated
A very adaptable border or string design.

ribbons


river


riverstones
makes quick border or filler because it's very adaptable depending on the overall shape you use to draw your "river"


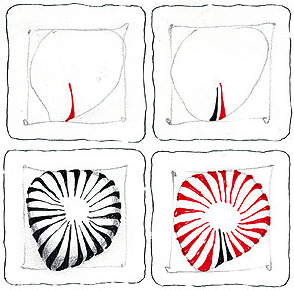
rose
You can pencil the lines in step 2 and erase them when you're done for a different look.


scrawlz
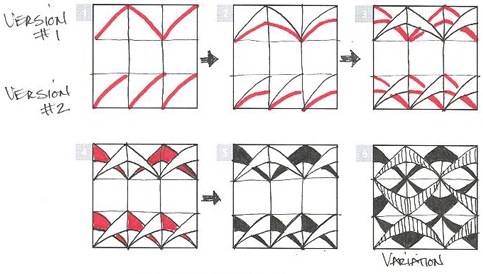
1. Begin with a wave of any variation.
2. I like a slightly pointed weighted end to the curl.
3. When the leaves go in slightly different directions, it imparts more movement to the design. I also draw over the central "stem" to darken it.
4. A few more slender arcs add interest, these are fairly random.

screen

scrumble
Play with the shading to make individual bobbles pop out or make it look like you have a cable by just shading one line.

semaphore
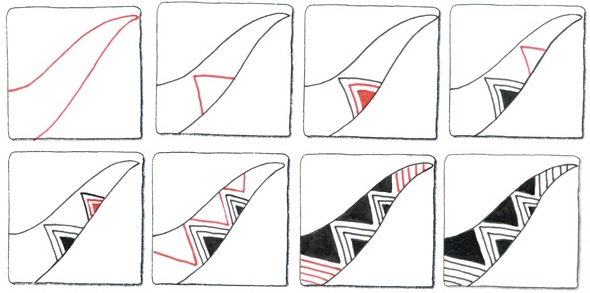
shard
The fun of this tangle is to begin the shards in random directions and take them as far as you like. There is no wrong way to do it. Once you connect the corners in step 5, the dimension begins to appear.


shattuck
draw the longest line first and then fill in the space that is created.
Or start at the narrow end and just work out until the line is touching both of the divider lines (and then can go one extra line).
Leave "holes" for sparkle - you will be surprised how much life it adds.
You can draw it as a more organic, plant-like shape, but if you do it flatter and straighter, it looks more basket-woven-ish. If you "mess-up" the back and forth weaving pattern, it still looks cool! If your rainbow arcs meet in the center, instead of near the veins, you get an amazing braided pattern.
Can be varied by shading and/or striping, or changing the shape of the arcs, and by varying the treatment you give to the "ribs".
When I do the shading for this tangle, I use a very soft pencil and I go over the longest/last line in the section of the fill then I "pull out" the shading (usually using a blending stub). I do the same thing on either side of the divider line(s). Keep in mind that the softer the lead, the more graphite will be left and the darker the shading will be so use it sparingly.
VARIATIONS:
Change how much curve you put in the line. The original Shattuck tangle is more stretched out (like the line next to "standard" in the photo) but the ones I generally do have more curve to them. Mine resemble the 2nd line or even have more curve to them. When it comes down to it, there are no "line police"--you could even do this with straght lines. It will not even register as the same tangle usually!
Change which side you begin the line of pattern on. Most of the time I begin the second line at the same end that I began the first line. Try beginning the line of pattern at the opposite end (4th line in the sample).
Change whether you start at the top or bottom of the line. Working from the same end/side, the pattern changes based on whether you begin all the lines on the top or bottom or if you alternate them. If you alternate beginning on the top and bottom and you keep the pattern consistent in size, you end up with half circles or half ovals (depending on how stretched out your pattern is) split by the divider lines. Very different look from what you see to the left. (no sample included here.)
Change your divider line(s). I like to use a line of pearls (white) or beads (black) between the divider lines sometimes. Sometimes after I have done the shading, I fill the divider lines using a gold metallic pen or a sparkle pen. Because I usually prefer black and white, if I am adding something, I most often use the "clear star" pen that adds sparkle without color.
Change the density of your lines. The density of your lines can really change the looks of your tangle. Try it with lots of lines close together. Then try it with fewer lines farther apart. This can change Shattuck from a "dark" or "heavy" fill to a "light" or "airy" fill. In most of my designs, I try to keep some balance between light and dark space fills. If the design feels "lop-sided" to me, I change the denisity of Shattuck for a quick balance.
Play with your lines. There is nowhere that says the lines must be parallel in the fill.... the tangle can be quickly and drastically changed by playing with your lines... see a couple of the sections on line 3 of the sample above.
I put in "bubbles" by drawing a very small circle at the "sparkle holes."


spinner
squares
starbarz
Designed to be a border but can be adapted to be a filler.
Try drawing the star as a cross first and then add the curved lines. Or try different fills.

static


strata
Draw shapes and connect them with straight lines. Try multiples of three going every which way.
A fun, simple pattern. You'll get totally absorbed in drawing the geometric shapes in varying sizes and all those little connecting lines. No planning, no pencil guidelines (never if it's a tangle pattern!), no decision-making.

striping
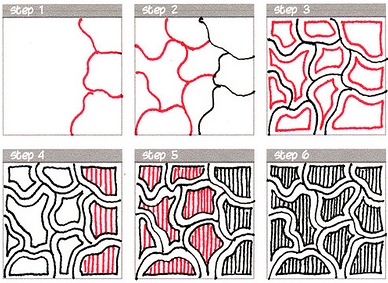
Draw the string. Then I added all the evenly-spaced (though they don't have to be) lines in each area. Then I filled in the shapes made by the lines. Previously I'd been taking one area of the string and completing it, then doing the part beside it, and so on. That really did not produce good results for me.
Draw the stripes in any direction and any thickness. For dimension, add a little shading wherever one set of stripes goes under another set.


strircles
An enhancement that you can use with many tangles. This tongue twister can add a lot of interest.


swarm

swirly dot
tearce

track lighting
trentwith
A good filler and a very pretty border. The icon has the white spaces embellished with dots but it looks great without them too. To get a ribbon of uniform size, use a double-pencil string.


tri-po
Use 3 or 4 lines. You can intersect them (by drawing behind - the Zentangle way), or put them next to each other. You can make some lines thicker to make them stand out.

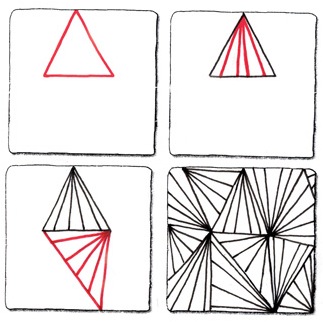
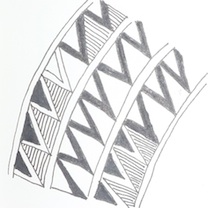
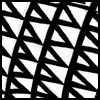
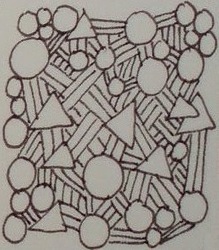
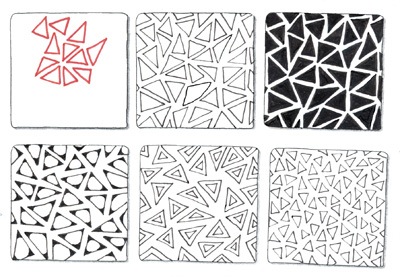
triangles
This has a lot of options for variation.
You can change the basic pattern by making all the triangles solid black but you can also fill them with other shapes or lines or just fill in the corners. They're also an effective filler simply with their own basic line shape. Triy another variation which is the reverse of the icon image - filling in the background between the triangles and leaving the triangles empty.

trimonds
Shading makes all the difference. You can shade the little segments in any way and you will get a different look - very three dimensional.
If you warp the underlying diamond grid you'll get some interesting asymmetrical effects.

tripoli
Your triangles can have curved or straight edges.
Leave a consistent space between them, like with aura.
Although clusters of six triangles are most common, you can just as easily have 5, 7, 8 or more mixed throughout your tile.
The basic structure is a malleable tessellation, but tripoli takes things a bit further. It's not just tiling adjacent triangles - a delightful tangle in itself - but what you then do within and between those triangles that yields amazingly different and fun results.
Even though it is constructed of triangles, it can have a gentle organic feel, like a slice of an orange or roasted garlic.
This tangle also introduces an effect called an Ehrenstein Illusion where tips of these triangles interact in a way that creates a space which seems brighter than surrounding areas.


Tripoli's negative space becomes positive space at the edges.
Tripoli's negative space becomes positive space at the edges.

triral
Triangular spirals.
Works very well as either a border or a filler.


tuftid
In Step 2, start the fan shape in the center, working outward. Make the lines straight or curvy.
It's fun, especially if you have an intricate string, to connect the ends of one section's tufts with the ends of the tufts in the adjoining section.


twisted rope
Can be varied by changing the spacing of the guiding dots with which you start the pattern.
With practice you will soon be able to eliminate the dots.

twistee

vache
Vache 1 and Vache 2.
A simple filler with lots of potential for variation. Try shading just inside the edge of each spot.

veinz

vortex
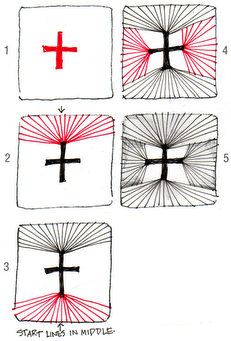
A vortex in a zentangle will draw the viewer's eye.
Start each line on a side at a corner of the box, and draw it across the side. That is what creates the darkness at the center.
It gains impact when shaded, giving it depth.
voxter
Circles don't have to be perfect. In fact the more imperfect the circle, the more interesting the pattern. Go slow but don't worry about its roundness.

warped eggs
Try to keep lines neat and evenly spaced.
Variants include making alternating stripes solid and/or leaving the basic outline empty in alternating rows. Or filling in the center. A little shading would add even more depth.

waves
For a border design or to fill larger shapes. Variants can include striping (filling in alternating areas) and shading for a dimensional effect.


web

wigwam
A versatile tangle pattern. You can "warp" your grid which always gives interesting results with any grid-based pattern. You can alternate the direction of the rows which gives a different look. You can use a different pattern of fills for the shapes.


wired

wisket
Once you get the lines in, this pattern can get confusing. Never fear though. It does well with a great deal of randomness, so feel free to go willy-nilly or slapdash!

woven

xyp
A great tangle pattern for borders as well as filling spaces within your strings.
One of the most versatile tangles. Make a very nice border or have stripes of XYP to fill a space. You can play with every element in the tangle to alter it.
You can curve the straight lines, straighten curved lines, add loops or dots or pearls (open dots/small circles) or beads (black small cirles), remove lines, add new lines, add shading inside or outside the originals aura, remove the aura. Remember, we learn the pattern so that we can learn how to manipulate it.


An example as a border. The top and bottom
ones are slightly different. The top starts
out as the original tangle does, right up
against the edge. The bottom half of the
"inside square" is the same but the top of
it has been extended and then beads were
added to it. The bottom show a "curvy"
example of the geometric at the top.
ones are slightly different. The top starts
out as the original tangle does, right up
against the edge. The bottom half of the
"inside square" is the same but the top of
it has been extended and then beads were
added to it. The bottom show a "curvy"
example of the geometric at the top.
An example as a border. The top and bottom
ones are slightly different. The top starts
out as the original tangle does, right up
against the edge. The bottom half of the
"inside square" is the same but the top of
it has been extended and then beads were
added to it. The bottom show a "curvy"
example of the geometric at the top.

yale
Looks more interesting at an angle but easier to construct straight.


yincut
By slightly curving your lines you add a sense of depth.
Create a sparkle by leaving a gap in some of the strokes.


zanella

zig zag border
Variants include additional shading, filling in (or not) pattern shapes, whether with a solid area or more detail.
zuan shi
Pencil in a grid as shown and leave in place while drawing the parallel lines to help with even spacing.

